Follow Me On Social Media!
Pizza Grilled Cheese

GOOD TO KNOW:
The jump to recipe button is there for convenience, but taking a moment to read the full post can make a real difference. You will find useful ingredient notes, extra step-by-step guidance, common troubleshooting answers, and other practical details that can help the recipe come out just right.
If you’ve been craving pizza but only have 10 minutes, this Pizza Grilled Cheese is your new weeknight hero. This pizza grilled cheese is cheesy, melty, toasty, and it legit tastes like a mini pan pizza smashed into a sandwich, and it makes my whole house in Austin smell like a pizzeria. It’s fast, budget-friendly, kid-approved, and honestly kind of magical. I stumbled into this years ago on a tired Friday when I had bread, cheese, “some kind of sauce,” and a wild need for comfort food, and now it’s one of those recipes my family begs for over and over again.
You get the best of both worlds here: crispy golden bread, gooey stretchy cheese, and whatever “pizza toppings” you love tucked right inside. It’s perfect for rushed lunches, late-night snacks, or that in-between moment when you don’t want to cook but you still really want something good. And you absolutely do not need fancy skills. If you can butter bread, you can make Pizza Grilled Cheese. You can do this. Really, you can.
Why This Pizza Grilled Cheese Totally Wins
This little sandwich wins for SO many reasons, and I feel weirdly passionate about it!!! It’s fast—like, truly under 15 minutes fast—so it works for busy parents, college students, and my fellow “I forgot to plan dinner” people. It’s super customizable, which means picky kids can have plain cheese while you go wild with veggies and extra sauce. It’s crazy comforting; that first bite of buttery crunch and melty cheese is just pure nostalgia and joy and coziness all stacked together. It’s also budget-friendly, using basic pantry ingredients you probably already have, making it a very real option when you’re watching grocery costs. If you’re trying to lighten things up a bit, you can use whole grain bread, light cheese, or pile in veggies and still get all the fun pizza vibes. And for the meal preppers and Pinterest savers—this is one of those recipes you’ll pin once and make ten times, because it’s easy, delicious, and totally yours every single time.
Ingredients You’ll Need (And How To Make Them Yours)
- 2 slices of bread
- 2 slices of cheese (mozzarella, cheddar, or your choice)
- Pepperoni slices (or other pizza toppings like bell peppers, onions, etc.)
- Butter for spreading
- Pizza sauce (optional for dipping)
Let’s talk details. Bread first: use whatever you love—white, sourdough, whole wheat, gluten-free. Thicker slices give you more “pizza crust” vibes, while thinner bread gets extra crisp. I usually grab a simple sandwich loaf from H‑E‑B here in Austin because it toasts up beautifully and it’s inexpensive.
Cheese is where the magic happens. Mozzarella is classic, super melty, and tastes the most like pizza. Cheddar adds sharpness and a little more richness. You can absolutely mix cheeses (do it, it’s so good) or use a dairy-free cheese if that’s what your body likes better. Shredded or sliced both work.
For the “pizza toppings,” pepperoni is traditional, but you can just as easily use sliced bell peppers, red onion, black olives, mushrooms, spinach, or even leftover cooked chicken. (I skip pork, so I go heavy on veggies or turkey pepperoni.) This recipe is incredibly forgiving—use what you have and what you enjoy.
Butter gives that golden, crunchy exterior. You can swap in olive oil spread, plant-based butter, or even a thin swipe of mayo if that’s your grilled cheese style. Pizza sauce is technically optional, but dipping that hot sandwich into warm sauce is a whole experience. Jarred marinara totally works; I usually stock a basic store-brand and doctor it with a pinch of dried oregano.
Cost tip: buy cheese blocks and shred them yourself; it melts better and is usually cheaper than pre-shredded.
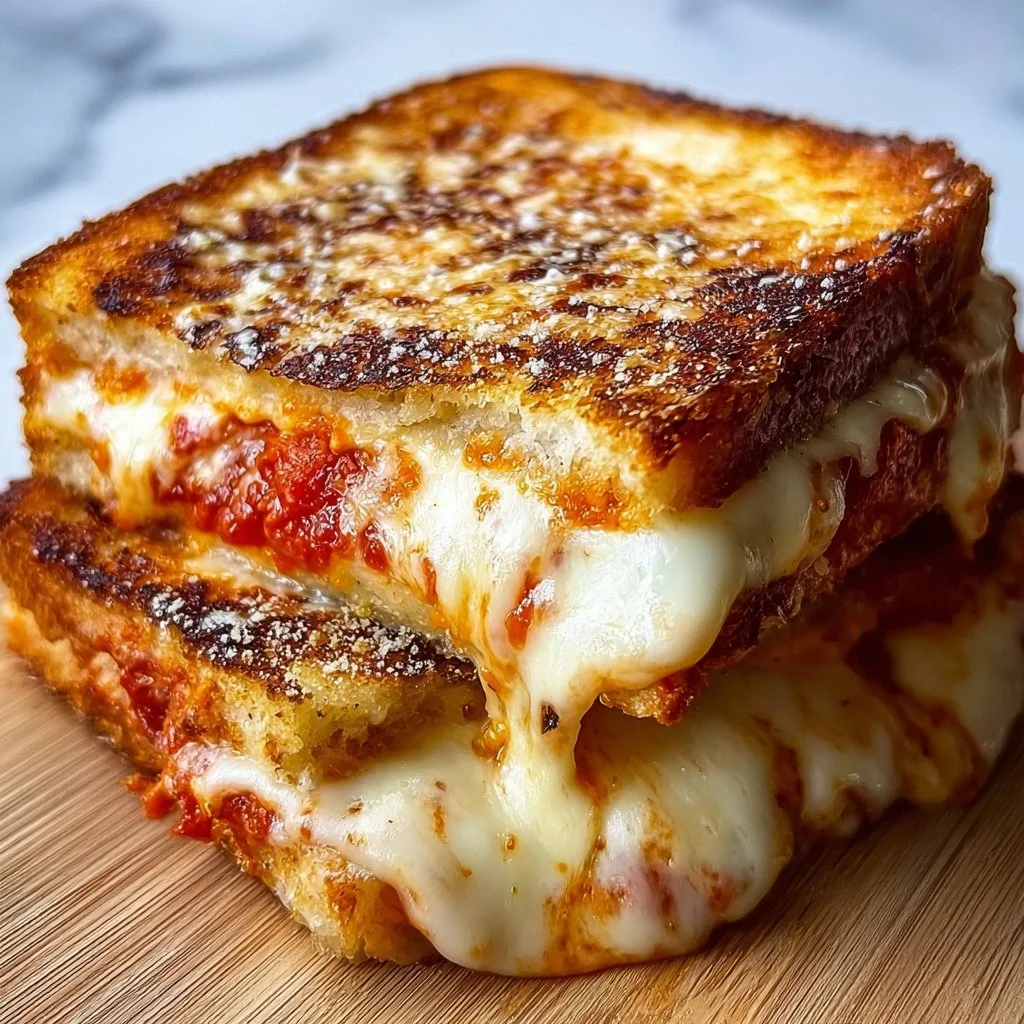
How To Make Pizza Grilled Cheese (Step-by-Step Love Story)
-
Heat a skillet over medium heat.
Give your pan a couple of minutes to warm up. Medium heat is your friend here—too hot and the bread burns before the cheese melts, too low and you’ll be waiting forever. If you’re nervous, start slightly lower; you can always nudge the heat up. Don’t worry, you’re in charge. -
Butter one side of each slice of bread.
Spread a thin, even layer of butter right to the edges on one side of each piece. This is what gives you that gorgeous, diner-style crisp. If your butter is cold and stubborn, just kind of dab and smear; it doesn’t have to be perfect. -
Place one slice of bread butter-side down in the skillet.
The buttered side hits the pan, and you’ll hear that soft little sizzle—that’s your cue you’re doing it right. This is your “crust.” -
Layer cheese and pizza toppings on top, then add the second slice of bread butter-side up.
Add one slice (or a good handful) of cheese on the bread in the pan, then your toppings: a few pepperoni or veggie slices, maybe a bit more cheese on top to “glue” it all together. Finish with the second slice of bread, buttered side facing up. Try not to pile it too high or it’ll be harder to flip, but honestly, if you go a little overboard you’ll still be fine—just flip carefully. -
Cook until golden brown, then flip carefully to cook the other side.
Let it cook 3–4 minutes, peeking underneath with a spatula. When the bottom is golden and crisp and the cheese is starting to melt, gently slide your spatula under and flip in one confident motion. (If some cheese or toppings try to escape, push them back in. No biggie.) Cook the second side another 2–4 minutes. -
Once both sides are crispy and the cheese is melted, remove from the skillet.
You’ll know it’s ready when both sides are deeply golden and you see cheese oozing at the edges. If the bread is browning faster than the cheese melts, just lower the heat and give it a minute with a lid on the pan to trap heat. Don’t stress; this is fixable. -
Serve with pizza sauce for dipping if desired.
Slice the sandwich in half (diagonal if you want maximum drama) and serve immediately with warm pizza sauce on the side. Steam, melt, crunch—all the good sensory stuff happens right here. Try not to burn your mouth in your excitement, but also I fully understand if you take that too-hot first bite.
Smart Tips, Teacher-Style
To make a few at once, assemble several sandwiches ahead of time and cook them one after another in the same skillet, or use two pans at once if you’re feeding a crowd. You can even butter and layer the sandwiches earlier in the day, stash them in the fridge, and just pan-fry when you’re ready—great for after-school chaos or game day. Leftovers (if they exist) keep surprisingly well: let them cool, wrap in foil, and refrigerate up to a day. Reheat in a skillet or air fryer so the bread gets crispy again; the microwave works in a pinch, but it does soften the bread. For kids, go simple: cheese only or cheese plus a tiny sprinkle of finely chopped veggies, then cut into strips or little squares. And remember, if a sandwich gets a bit too dark, it’s not ruined—call it “extra toasty,” scrape off any very dark spots, and try a lower heat next time. You’re learning, it’s okay, we all do.
How To Serve Your Pizza Grilled Cheese
You can absolutely serve this all by itself and be totally happy, but if you want to round it out, pair it with a simple salad, a cup of tomato soup, or some raw veggies and hummus for balance. For a fun family night, set up a “pizza grilled cheese bar” with bowls of toppings—bell peppers, onions, olives, turkey pepperoni, spinach—and let everyone build their own. It’s chaotic, it’s messy, and it’s so fun. I love serving this on a wooden board with a little dish of warm pizza sauce and maybe some carrot sticks, because it looks cute without any extra work. Leftovers can be sliced into strips and packed in lunchboxes; they’re actually pretty good at room temp, more like a cold pizza situation. Make it for movie night, sleepovers, game-day snacks, or one of those “it’s too hot to turn on the oven” summer evenings. Just one try and you’re going to want it again. And again.
Pizza Grilled Cheese FAQ
Yes, absolutely. You can use olive oil, avocado oil spray, or a plant-based spread instead. The flavor will be slightly different, but you’ll still get a nice toasted exterior if you keep the heat on medium and give it time to crisp.
Mozzarella is my top pick because it melts beautifully and tastes the most like classic pizza, but a combo of mozzarella and cheddar is outrageously good too.
You can. Assemble the sandwich as written, then air fry at about 370°F (190°C) for 5–8 minutes, flipping halfway if your basket allows it. Check often the first time you try so you learn how your specific air fryer behaves.
You can freeze them, but I honestly prefer them fresh or just refrigerated. If you do freeze, cook the sandwiches, let them cool, wrap tightly, and reheat in a skillet or air fryer so the bread crisps back up.
Use whole grain or sprouted bread, go a little lighter on the cheese, and add lots of veggie toppings like spinach, mushrooms, or peppers. It still tastes like a treat, just with a little extra nutrition tucked in.
This Pizza Grilled Cheese is one of those tiny kitchen miracles: simple ingredients, big flavor, basically no stress. It’s easy, it’s FAST, and it’s honestly so, so delicious—over and over again. If you try it, tell me what toppings you used and how it went; I genuinely love hearing your tweaks and wins. Tag your sandwich on social (Pinterest, Instagram, wherever you hang out) so I can cheer you on from here in Austin. Now go make yourself a pan, okay?
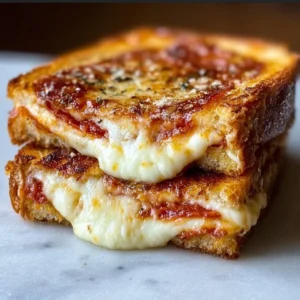
Pizza Grilled Cheese
This Pizza Grilled Cheese is a fast, budget-friendly, and cheesy delight, combining the flavors of pizza and grilled cheese into a crispy sandwich.
Ingredients
Sandwich Base
- 2 slices bread Use your choice of bread: white, sourdough, whole wheat, or gluten-free.
- 2 slices cheese (mozzarella, cheddar, or choice) Mozzarella is classic and super melty; cheddar adds sharpness.
- as needed pizza toppings (pepperoni, bell peppers, onions, etc.) Add to taste; can include leftover cooked chicken or other favorites.
- as needed butter For spreading on the bread.
Optional Dipping Sauce
- to serve pizza sauce For dipping, jarred marinara can also be used.
Instructions
Preparation
- Heat a skillet over medium heat.
- Butter one side of each slice of bread.
- Place one slice of bread butter-side down in the skillet.
Assembly
- Layer cheese and pizza toppings on top of the bread in the skillet, then add the second slice of bread butter-side up.
Cooking
- Cook until golden brown, then flip carefully to cook the other side.
- Once both sides are crispy and the cheese is melted, remove from the skillet.
Serving
- Serve with pizza sauce for dipping if desired.
Notes
This sandwich is customizable and forgiving; feel free to use different toppings or cheese. Great for meal prep and leftovers can be reheated for a crispy finish.