Follow Me On Social Media!
Crispy Pickle Cheese Bites

GOOD TO KNOW:
The jump to recipe button is there for convenience, but taking a moment to read the full post can make a real difference. You will find useful ingredient notes, extra step-by-step guidance, common troubleshooting answers, and other practical details that can help the recipe come out just right.
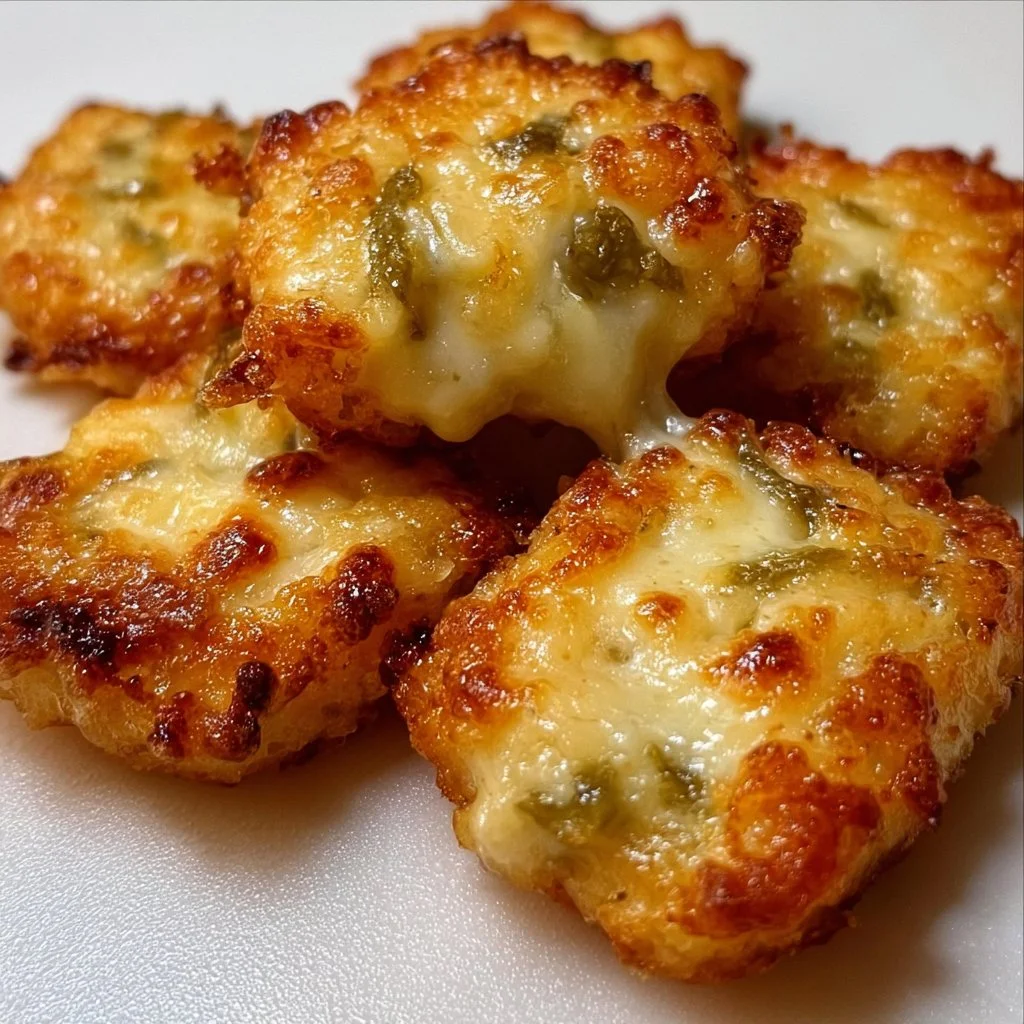
If you are hunting Pinterest for crispy snack ideas, these Crispy Pickle Cheese Bites are about to become your new obsession. Crispy Pickle Cheese Bites are salty, cheesy, tangy, and just ridiculously snackable, and yes, I’m saying “Crispy Pickle Cheese Bites” over and over because they really are THAT good. They come together fast, use simple ingredients, and hit all the cravings at once: crunchy, gooey, and a little bit briny from those dill pickles.
I first threw these together on a random Friday when I had leftover pickles, a chunk of cheddar, and zero desire to go to the store. Total experiment. Total win. They disappeared off the plate so fast my kids were honestly confused, like, “Are there more?” (There were not. Rookie mistake.) Now they’re a go‑to for game days, movie nights, and honestly just “I need something FUN” nights. They’re affordable, they fry up quickly, and you can easily air fry or bake if you’re watching oil or just don’t feel like standing at the stove. Crispy, cheesy, pickle-y joy in every single bite!!!
Why These Little Bites Absolutely Belong In Your Life
You’re going to love these for so many reasons, it’s almost silly. First, they are FAST—like mix, roll, fry, done. No marinating, no chill time, no mystery steps. If you can stir and roll, you can make them. They’re also wildly customizable: more cheese? Do it. Spicier pickles? Yes. Whole wheat crumbs? Sure. You can lean low‑carb by swapping the breadcrumbs for a keto crumb mix, or make them a little lighter by baking or air frying.
They’re crowd‑pleasers too, which I love because I’m always feeding a mix of kids, teens, and adults. The pickle lovers go crazy for that tang, but even the pickle‑skeptical people end up eating a second one because the cheese plus crisp coating is just SO GOOD, so good, seriously so good. These Crispy Pickle Cheese Bites are also budget‑friendly, using basic pantry and fridge staples you probably already have hanging around. And if you’re gluten‑free or vegetarian, you can absolutely adapt these—this recipe plays nice with everyone. The best part? They look impressive, but the effort level is absolutely minimal. You’re winning without working harder, which is my favorite kind of kitchen win.
Ingredients You’ll Need (And How To Make Them Yours)
- 1 cup cheddar cheese, grated
- 1 cup mozzarella cheese, grated
- 1 cup dill pickles, chopped
- 1/2 cup bread crumbs
- 1 egg, beaten
- 1/2 teaspoon garlic powder
- Salt and pepper to taste
- Oil for frying
Let’s talk about the fun stuff here. The combo of cheddar and mozzarella gives you flavor plus stretch—the cheddar brings that sharp, bold taste, while the mozzarella gives you that melty, stringy situation we all secretly live for. You can totally use Colby‑Jack, pepper jack, or a “pizza blend” if that’s what you have. This is a flexible, forgiving recipe, not a fussy one.
Dill pickles are the STAR. I love classic dill chips from the fridge section at H‑E‑B here in Austin, but you can use spears, whole pickles, even spicy dills. Just chop them pretty small so the bites hold together. If you’re watching sodium, look for low‑sodium dill pickles or just pat them extra dry.
Any plain bread crumbs work—regular, panko, whole wheat, or even a gluten‑free version. Panko gives you an especially loud crunch. For a lower‑carb option, try crushed baked cheese crisps or almond flour; it won’t be exactly the same, but honestly still super tasty. Garlic powder, salt, and pepper keep things simple, but you could also toss in smoked paprika, onion powder, or dried herbs if you’re feeling spicy.
I usually grab store‑brand cheeses and crumbs to keep this very cost‑friendly. Cheese is the “pricier” part, but you’re only using two cups total, and it stretches a long way. Please feel totally free to experiment. This is YOUR kitchen. Make it easy, make it delicious, make it yours.
How To Make Crispy Pickle Cheese Bites (Step‑By‑Step In Real Life)
- In a bowl, mix the cheddar cheese, mozzarella cheese, and chopped dill pickles.
- Add the garlic powder, salt, and pepper, and mix well.
- Form the mixture into small balls or bites.
- Dip each bite in the beaten egg and then roll in bread crumbs to coat.
- Heat oil in a frying pan over medium heat.
- Fry the bites until golden brown and crispy on all sides.
- Remove and drain on paper towels. Serve warm.
Start with a medium mixing bowl and toss in your grated cheddar, mozzarella, and chopped dill pickles. Aim for pickle pieces about pea‑size; too big and they’ll try to escape. If the mixture looks very wet, pat the pickles with a paper towel first. Don’t worry if it feels a little loose—once you squeeze it together with your hands, it magically behaves.
Sprinkle in the garlic powder, a pinch of salt, and a few grinds of pepper. Mix really well so every bite has that cheesy‑garlicky goodness. Taste a tiny bit (no egg yet, so you’re safe) and adjust seasoning; remember the pickles are salty, so go gentle with extra salt.
Now, use your hands or a small cookie scoop to form the mixture into small balls or nugget‑shaped bites—think about 1 to 1 1/2 tablespoons each. Press firmly so they hold together; a little squeeze goes a long way. If they’re just not sticking, add a teaspoon or two of breadcrumbs into the cheese mixture to help bind it. See? Easy fix.
Beat the egg in a small bowl. Pour the bread crumbs into another small bowl. Dip each cheese‑pickle ball into the egg, letting any extra drip off, then roll it in the bread crumbs until fully coated. This is where the crunch magic happens. If any look patchy, just press on a bit more crumbs.
Heat about 1/2 inch of oil in a frying pan over medium heat. You want hot but not smoking—drop in a breadcrumb; if it sizzles immediately, you’re ready. Carefully lower the bites into the oil, leaving a little space between them. They’ll need about 2–3 minutes per side, turning so all the surfaces get that deep golden color. If they’re browning too fast, lower the heat; if they’re just sitting there, turn it up a bit. You’re in charge here.
When they’re beautifully golden and the cheese inside is melty, move them to a plate lined with paper towels to drain. They’ll crisp up even more as they sit for a minute. Don’t stress if a little cheese leaks out here and there—that just means they’re extra gooey inside.
Smart Tips, Make‑Ahead Moves, And Teacher‑Voice Coaching
You can absolutely roll these ahead of time. Form the bites, bread them, then chill on a parchment‑lined tray for up to 24 hours before frying. (This actually helps them hold together even better.) For freezing, freeze the breaded, uncooked bites on a tray, then transfer to a freezer bag—cook from frozen, adding a couple extra minutes.
Leftovers—if you have any—keep well in an airtight container in the fridge for up to 3 days. To reheat, skip the microwave if you want that crunch back. Use an air fryer at 350°F for about 4–6 minutes, or pop them in the oven at 375°F until hot and crisp again. They really do crisp up nicely a second time.
Batch‑cooking? Double or even triple the recipe, especially for parties or game days. Just fry in batches and keep finished bites warm in a low oven (around 200°F). For kids, you can make the bites a little smaller—snack‑able “tots” size—and maybe use milder pickles if they’re sensitive to tang. And honestly, don’t overthink it. You can do this, even on a busy school night or in between a million other things, and it will still turn out delicious.
Fun Ways To Serve These Crispy Little Show‑Offs
These Crispy Pickle Cheese Bites shine on an appetizer board with carrot sticks, celery, and a couple of dipping sauces—think ranch, spicy mayo, or a yogurt‑based dip if you want to lighten it up a bit. They’re also amazing tucked into a game‑day spread next to wings, veggie platters, and chips. I love serving them in a little parchment‑lined basket; it feels like fair food, but made at home and way cheaper.
They make a fun side for burgers, grilled chicken, or even a big salad when you want something indulgent on the side. Leftovers can be chopped and tossed into a salad or stuffed into a tortilla with lettuce and tomato for a very not‑boring wrap. I’ve even put a couple on top of tomato soup for a wild grilled‑cheese‑vibes moment.
Honestly, these are “come hang out in the kitchen” food, the kind you pass around while you chat. If you’ve been looking for a new party trick, something that makes people say, “Wait, what IS this?”, this is it. You will feel so proud when everyone is reaching for seconds and thirds.
Questions Everyone Asks About These Bites
Yes, you totally can. Place the breaded bites on a parchment‑lined baking sheet, spray lightly with oil, and bake at 400°F for about 12–16 minutes, turning once, until golden and crispy. They won’t be quite as dramatically crunchy as deep‑fried, but they’re still really, really good.
Nope. You can use just one cheese if that’s what you have. Cheddar alone gives big flavor, mozzarella alone gives more stretch but milder taste. A mix is my favorite, but this recipe is very forgiving.
Yes, and they do great in there. Place the breaded bites in a single layer, spray them with a little oil, and air fry at 375°F for about 8–10 minutes, shaking the basket halfway. Check early the first time since every air fryer runs a bit different.
Classic dill pickles are my go‑to because that tang cuts through the richness of the cheese, but you can absolutely play—spicy dills, sandwich chips, or even garlic dills all work. I’d skip sweet pickles for this recipe because the sugar can brown too fast and the flavor gets a bit weird with the cheese.
Yes. Bread them earlier in the day, keep them chilled on a tray in the fridge, then fry (or bake/air fry) right before guests arrive. You can also fry a first batch, hold them warm in the oven, and keep frying as people eat.
These Crispy Pickle Cheese Bites are exactly what I love: easy, crispy, cheesy, and endlessly adaptable. They look fancy, but the steps are simple enough for a weeknight, and they taste like something you’d order at a restaurant and then immediately try to copy at home. Please tell me if you tweak them—different cheeses, different crumbs, all of it—I love hearing how you make it yours.
If you try them, drop a comment, send me a message, or tag your photos on social (I’m always browsing while I sip my coffee in Austin). I’m honestly so excited to see what you do with these, because once you make them once… you’re going to want to make another batch right away, aren’t you?
Crispy Pickle Cheese Bites
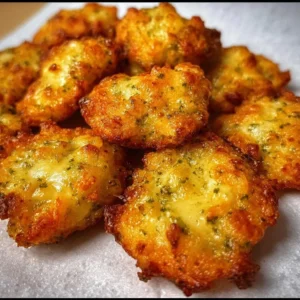
These Crispy Pickle Cheese Bites are salty, cheesy, tangy, and ridiculously snackable, perfect for game days and movie nights.
Ingredients
Cheese Mixture
- 1 cup cheddar cheese, grated Can use Colby-Jack or pepper jack as alternatives.
- 1 cup mozzarella cheese, grated For a chewier texture.
Main Ingredients
- 1 cup dill pickles, chopped Can use spicy dills or whole pickles, chopped small.
- 1/2 cup bread crumbs Panko gives extra crunch.
- 1 egg, beaten For coating.
Seasonings
- 1/2 teaspoon garlic powder Feel free to add more spices.
- Salt and pepper to taste Be cautious with salt since the pickles are salty.
- Oil for frying Can also air fry or bake.
Instructions
Preparation
- In a bowl, mix the cheddar cheese, mozzarella cheese, and chopped dill pickles.
- Add the garlic powder, salt, and pepper, and mix well.
- Form the mixture into small balls or bites.
Coating
- Dip each bite in the beaten egg and then roll in bread crumbs to coat.
Cooking
- Heat oil in a frying pan over medium heat.
- Fry the bites until golden brown and crispy on all sides.
- Remove and drain on paper towels. Serve warm.
Notes
You can prepare these ahead of time by breading them and chilling for up to 24 hours before frying. Leftovers can be stored in the fridge for up to 3 days.