Follow Me On Social Media!
Cake Mix Toffee Bars

GOOD TO KNOW:
The jump to recipe button is there for convenience, but taking a moment to read the full post can make a real difference. You will find useful ingredient notes, extra step-by-step guidance, common troubleshooting answers, and other practical details that can help the recipe come out just right.
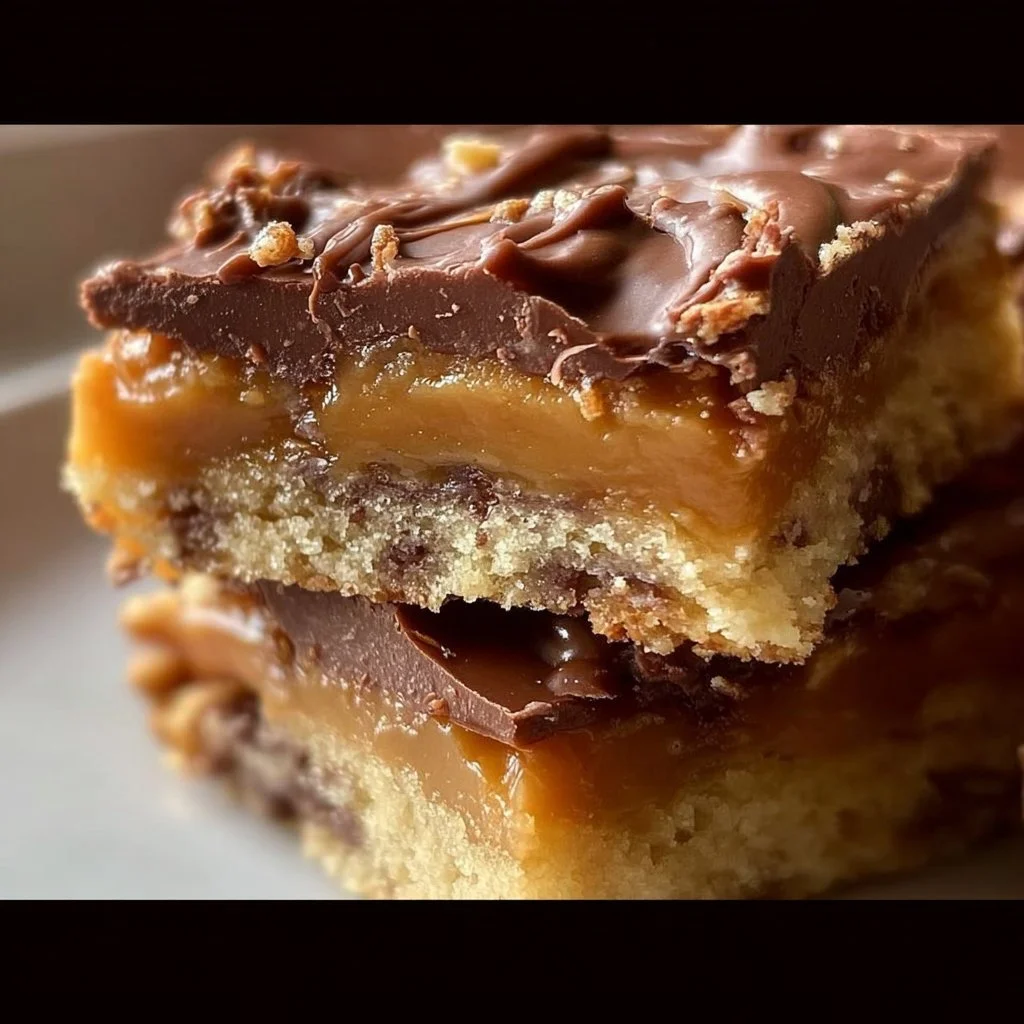
Cake Mix Toffee Bars are my shortcut dessert DREAM, and I’m not exaggerating even a little bit. These Cake Mix Toffee Bars are gooey, chewy, crazy-easy, and they start with a humble box of cake mix you probably already have in your pantry. One bowl, one pan, so much chocolatey toffee goodness.
I love this recipe because it tastes like you spent all afternoon in the kitchen, but it’s almost embarrassingly simple. We’re talking minimal dishes, maximum payoff, and a dessert that works for bake sales, potlucks, after-school snacks, or those late-night “I need something sweet right now” moments. You know the ones.
I stumbled into these bars years ago when I was a tired teacher trying to bring something homemade to a staff potluck without staying up until midnight. I grabbed a cake mix, melted some butter, stirred in sweetened condensed milk, tossed chocolate chips and toffee bits on top, and just hoped it baked into something edible. It did more than that. It became an instant “Can I have the recipe?” situation. Over and over. Same questions, same compliments, every single time.
So now, Cake Mix Toffee Bars have become one of my go-to recipes for busy weeks, school events, and honestly, just random Tuesdays in Austin when I want the house to smell like a bakery. You can absolutely do this. You really, really can!!
Why These Toffee Bars Totally Earn a Spot in Your Rotation
You’re going to fall hard for these, and not just a little. First, they are SO easy it almost feels like cheating. One box of cake mix, a can of sweetened condensed milk, butter, chocolate chips, and toffee bits—that’s it. No mixer, no complicated steps, no weird specialty ingredients. And they taste like a fancy bakery bar that you’d happily pay for, which is wild considering how fast they come together.
They’re also incredibly forgiving. Not a confident baker yet? These Cake Mix Toffee Bars are like baking with training wheels—you basically just stir, spread, sprinkle, and bake, and somehow they always come out rich and gooey and golden. If you’ve ever had a recipe fail right before guests arrive (been there, more than once), this one is your new safe place. They work for busy parents, college students with tiny kitchens, meal preppers who want dessert ready to go, and my fellow recipe collectors who live for easy wins.
And truly, the flavor is just ridiculous. The base is soft and chewy, the chocolate gets melty and fudgy, and the toffee bits add this buttery crunch that makes everybody go, “Wait. WHAT is in these?!” They’re rich but not fussy, sweet but not overcomplicated. Honestly, they’re a little magical. And yes, I will say they’re magical more than once, because they really are that good!!!
Simple Ingredients, Big Flavor
Here’s everything you need to make Cake Mix Toffee Bars:
- 1 box cake mix
- 1 can sweetened condensed milk
- 1 cup chocolate chips
- 1 cup toffee bits
- 1/2 cup butter, melted
The cake mix is our shortcut superstar. I usually reach for a yellow or butter cake mix, but you can play around—chocolate cake mix gives you a super-decadent brownie-vibe bar, and spice cake mix feels extra cozy in the fall. Use whatever brand is on sale; this recipe is extremely chill and cost-conscious, so no need to hunt down anything fancy.
Sweetened condensed milk is what makes everything taste impossibly rich and caramel-y. It bakes into the cake mix and butter to create this gooey, almost fudge-like texture. Yes, it’s sweet, but that’s the point—it’s dessert. (And it’s actually great for portion control because a little bar goes a long way.)
Chocolate chips: I like semi-sweet because they balance the sweetness of the condensed milk. But honestly, use what you have—milk chocolate, dark chocolate, even a mix of both. I buy the big bags at Costco or on sale at the grocery store, then keep them in the pantry for recipes like this.
Toffee bits are the secret crunch. You can usually find them near the chocolate chips at most grocery stores. If you can only find chocolate-covered toffee bits, that’s fine too—you’ll just get extra chocolate swirls. They’re not “healthy,” obviously, but they’re happy-making, and that counts for something.
Butter. Melted. I typically use unsalted, but if you only have salted butter, that’s absolutely fine; it actually adds a tiny bit of balance to all the sweetness. Butter is what binds the base together and gives you that soft, chewy, cookie-bar texture we’re obsessed with.
Feel free to experiment—swap in white chocolate chips, add a handful of chopped nuts, or a sprinkle of flaky sea salt on top for that fancy dessert vibe with almost no extra effort.
How to Make Them (It’s Honestly So Doable)
Preheat the oven to 350°F (175°C). While the oven warms up, take a deep breath. You’re about to make something wonderful with very little effort.
In a mixing bowl, combine the cake mix with melted butter and sweetened condensed milk until well blended. The mixture will be thick and sticky—kind of like a super soft cookie dough crossed with brownie batter. Don’t worry if it looks a little messy; that’s exactly right. If it seems too stiff to stir, just keep going for another 30 seconds or so; it will come together.
Spread the mixture into a greased baking dish. An offset spatula or the back of a spoon helps here. It might not look perfectly smooth, and that’s okay—once it bakes, everything evens out. Lightly greasing your spoon or spatula can help keep the dough from sticking and making you crazy.
Sprinkle chocolate chips and toffee bits on top. Try to get them fairly even so every bar has some melty chocolate and crunchy toffee. If a few spots look bare, just throw on a couple more chips. There’s no such thing as “too even” when it comes to toppings, but really, it doesn’t have to be perfect.
Bake for 25–30 minutes until golden and set. Around the 22-minute mark, peek in the oven. The edges should look lightly browned and a little firm, and the center should look set but still slightly soft. If it’s still very jiggly in the middle, give it another 3–5 minutes. Every oven has its personality, so trust your eyes more than the exact minute count.
Allow to cool before cutting into bars and serving. This part is hard, I know, but if you cut too soon, they’ll be way too gooey to slice cleanly (though still very delicious, to be fair). Let them cool at least 30–40 minutes. If you’re in a hurry, you can pop the pan in the fridge for faster firming. And if they seem too soft after cutting? Chill them a little longer—they’ll set up beautifully. You’re totally in control here!!
Little Tricks That Make These Even Better
If you want to make these ahead, you’re in luck—they actually get even better after they sit for a few hours. Bake them the night before, let them cool completely, then cover the pan tightly. The next day, slice into bars and they’re ready for lunchboxes, after-dinner dessert, or a bake-sale table.
For storage, keep the bars in an airtight container at room temperature for up to 3 days. In hot weather (hello, Texas summer), I sometimes store them in the fridge so the chocolate doesn’t get too soft. They also freeze surprisingly well: wrap individual bars and freeze for up to 2 months, then thaw on the counter. Great for portion control and meal prep dessert.
To reheat, a quick 10–15 seconds in the microwave makes them taste like they just came out of the oven again—gooey, fragrant, and just a little dangerous. Add a spoonful of vanilla yogurt or a scoop of ice cream if you want to go all in.
Batch cooking? Double the recipe and use a large baking pan. You may need to add 3–5 extra minutes of baking time; just watch for those golden edges. And if you’re baking with kids, let them be in charge of sprinkling the chocolate chips and toffee bits—this is the low-stress part they LOVE, and the bars still come out looking amazing even if everything’s clumped in the middle (ask me how I know).
Fun Ways to Serve Your Cake Mix Toffee Bars
These bars are super flexible, which I love. For casual family nights, I just cut them into squares and pile them on a plate—nothing fancy, just a stack of happiness on the kitchen counter. For parties or potlucks, I trim the edges for neat squares (those edges become the “chef’s snack,” obviously) and arrange them on a platter with a little dusting of powdered sugar.
Pair them with coffee for an afternoon treat, or with cold milk for the kids. For a more over-the-top dessert, warm a bar slightly and top with vanilla ice cream and a drizzle of chocolate or caramel sauce. It’s the kind of dessert that makes everyone at the table suddenly quieter because they’re too busy enjoying it.
Leftovers—if you have any—can be crumbled over yogurt or ice cream as a quick “crunchy topping,” or packed into lunchboxes as a sweet surprise. I sometimes freeze a few and pull them out on long workdays for a 3 pm pick-me-up. You deserve that tiny bit of joy in the middle of your day, you really do!!
Questions You Might Be Asking
Yes, absolutely. Yellow and butter cake mixes are classics, but chocolate, vanilla, or even spice cake mix all work. Each one gives the bars a slightly different personality, but the method stays exactly the same.
Nope. If you can’t find toffee bits or don’t like them, you can swap in chopped nuts, extra chocolate chips, butterscotch chips, or even a mix. The texture will change a bit, but the bars will still be rich and delicious.
Look for lightly golden edges and a center that looks set but still soft. If the middle is still very shiny and jiggly, give it a few more minutes. They’ll firm up as they cool, so don’t wait until they’re completely firm in the oven or they may dry out.
It’s a little tricky because sweetened condensed milk is such a big part of the texture, but you can experiment with dairy-free sweetened condensed coconut milk and vegan butter. The flavor will be a bit different, more coconut-forward, but still very tasty.
A standard 9×13-inch baking dish works well for this recipe. If you use a smaller pan, the bars will be thicker and may need a couple extra minutes in the oven.
These Cake Mix Toffee Bars are one of those rare recipes that hit every mark—easy, fast, crowd-pleasing, and endlessly customizable. They look impressive, they taste even better, and yet they’re simple enough for a busy weeknight or a last-minute invite. You can do this. Really, you can, and I cannot wait for you to taste how good they are!!!
If you try them, come back and tell me how it went—what cake mix you used, what swaps you tried, who you shared them with. Tag me on social media with your pan of bars so I can cheer you on. Now go preheat that oven and make your kitchen smell AMAZING…
Cake Mix Toffee Bars
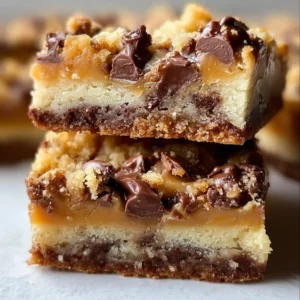
Deliciously gooey and chewy toffee bars made easily with cake mix, chocolate chips, and toffee bits—perfect for any occasion.
Ingredients
Main ingredients
- 1 box cake mix Yellow or butter cake mix is recommended.
- 1 can sweetened condensed milk Adds richness and gooey texture.
- 1 cup chocolate chips Semi-sweet chocolate chips are preferred.
- 1 cup toffee bits Can substitute with chopped nuts or chocolate-covered toffee bits.
- 1/2 cup butter, melted Unsalted butter is recommended, but salted is acceptable.
Instructions
Preparation
- Preheat the oven to 350°F (175°C).
- In a mixing bowl, combine the cake mix with melted butter and sweetened condensed milk until well blended.
- Spread the mixture into a greased 9x13-inch baking dish.
- Sprinkle chocolate chips and toffee bits on top evenly.
Baking
- Bake for 25–30 minutes until golden and set.
- Allow to cool for at least 30–40 minutes before cutting into bars.
Notes
For storage, keep in an airtight container for up to 3 days, or freeze individual bars for up to 2 months. They taste great reheated in the microwave for 10–15 seconds.