
Follow Me On Social Media!
Homemade Lemon Crumb Bars

GOOD TO KNOW:
The jump to recipe button is there for convenience, but taking a moment to read the full post can make a real difference. You will find useful ingredient notes, extra step-by-step guidance, common troubleshooting answers, and other practical details that can help the recipe come out just right.
If you love bright, bakery-style desserts, these Homemade Lemon Crumb Bars are going to live in your kitchen. These lemon crumb bars are sweet, tangy, buttery, and honestly kind of dangerous because they’re THAT easy to keep eating. They’re simple enough for a weeknight, pretty enough for a brunch table, and totally meal-prep friendly for my Pinterest planners out there. I make these lemon crumb bars when I need something quick, when I need something special, and when I just need something happy.
I first threw these together on a Sunday when I had one lonely lemon in the fridge and a can of sweetened condensed milk that had been staring at me forever. I wanted something like a lemon pie, but less fussy. No rolling dough, no water bath, no stress. What came out of the oven was this insanely soft, chewy, crumbly lemon bar situation that my kids inhaled. I’ve tweaked and tested and re-tested (teacher habits die hard), and now this is my go-to lemon dessert recipe.
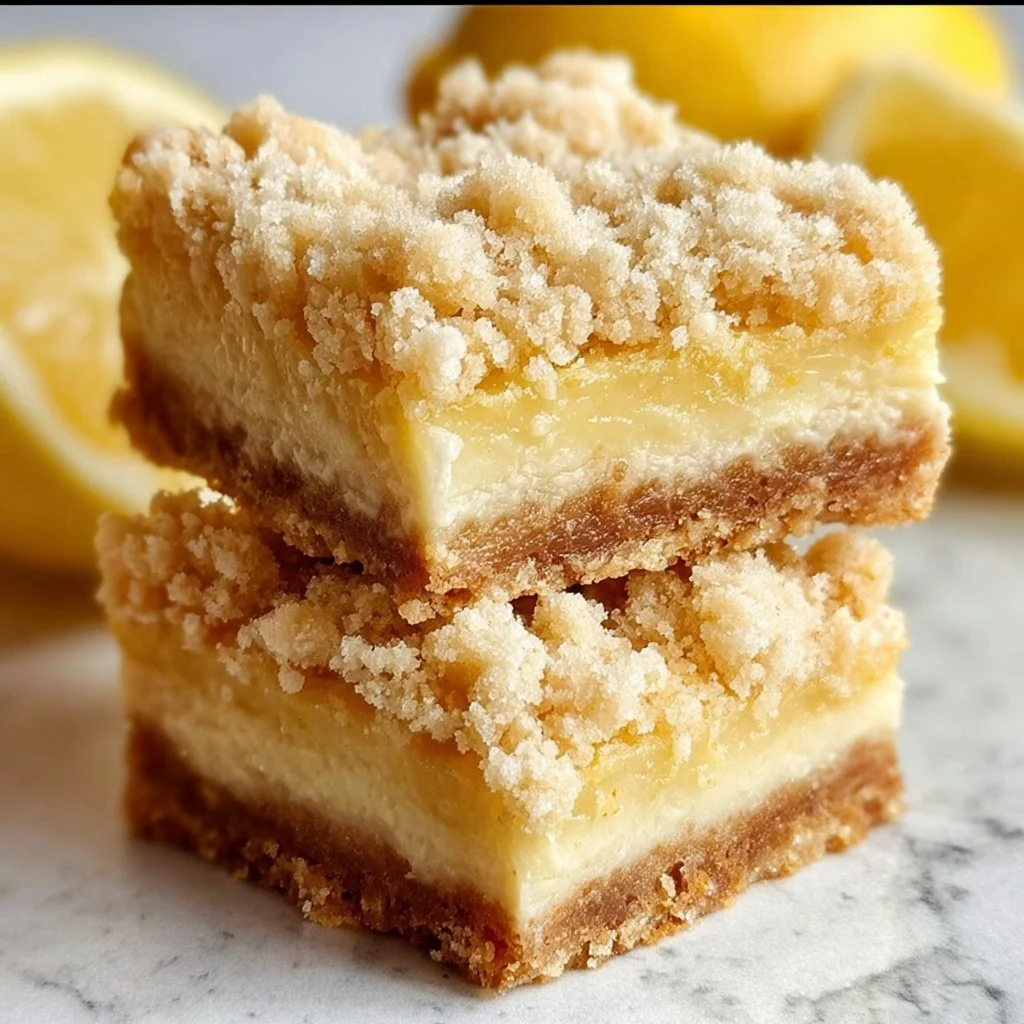
You’re getting a buttery oat crust, a creamy lemon filling that tastes like sunshine, and a golden crumb topping that feels like a cookie and a crumble had a baby. They freeze beautifully, pack well in lunches, and make you look VERY put-together even when you threw them together at 9 p.m. You can absolutely do this, and you’re going to be SO glad you did.
Why These Lemon Bars Totally Deserve Your Oven Time
You’ll love these Homemade Lemon Crumb Bars because they hit that perfect sweet-tart balance that just wakes up your tastebuds in the best way. The crust and crumb topping are made from the same easy mixture, so you’re not juggling five bowls and a sink full of dishes—just mix once, use twice, done. If you’re a lemon lover, they’re bright and tangy; if you’re usually “meh” on lemon, they’re creamy and gentle enough that you’ll still go back for another square. They’re amazing warm, they’re amazing chilled, and they’re even better the next day, which almost feels unfair.
Busy week? These work. Need something your kids will actually eat? These work. Want a dessert that looks impressive for a baby shower or Easter but secretly took you under an hour of active time? Oh, these REALLY work. They’re naturally free of nuts and super easy to tweak if you’re watching dairy or trying to sneak in whole grains. I love that they feel like bakery magic without bakery drama, and honestly, they’re just so comforting, so cozy, so reliable. It’s one of those recipes you’ll keep coming back to again and again and again.
What You’ll Need for Your Lemon Crumb Bars
- 1 cup all-purpose flour
- 1 cup old-fashioned oats
- 1/4 teaspoon salt
- 3/4 teaspoon baking soda
- 10 tablespoons unsalted butter, melted
- 1/2 cup light brown sugar, packed
- 1 teaspoon pure vanilla extract
- 1 (14 oz) can sweetened condensed milk
- 2 tablespoons sour cream (or plain yogurt)
- 1 large egg yolk
- 1/4 cup freshly squeezed lemon juice
- 1 tablespoon finely grated lemon zest
The secret heroes here are the oats and the sweetened condensed milk. The oats give that crust and crumb topping a toasty, chewy, almost granola-cookie vibe that feels more filling and a tiny bit more wholesome (fiber always wins). The sweetened condensed milk is what makes the filling crazy-smooth and almost fudgy without needing cream cheese or tons of extra sugar.
If you don’t have sour cream, plain Greek yogurt works beautifully and brings a little protein boost. No unsalted butter? Use salted and just skip the added salt—totally fine. You can even swap about half the all-purpose flour for white whole wheat if you like a little more nuttiness. I usually grab store-brand oats and flour from H‑E‑B here in Austin because they’re budget-friendly and work perfectly. This is a very forgiving recipe, so don’t stress; use what you’ve got and make it yours.
How to Make Them: Step-by-Step Overview
First, get your oven going at 350°F (175°C). Line an 8×8-inch baking pan with parchment paper and spray with nonstick spray. That parchment sling is going to save you later when you want to lift the bars out and slice clean squares. If the parchment is curling, just crumple it once and flatten it—that little trick helps it behave.
In one bowl, whisk together the flour, oats, salt, and baking soda. This is your dry base for both crust and crumbs. In another bowl, stir together the melted butter, brown sugar, and vanilla extract until it’s glossy and smells like a cookie shop. Pour the wet into the dry and mix until everything looks evenly moistened and clumpy. If it feels too dry, don’t panic—give it another 20–30 seconds of stirring; the oats soak up the butter slowly.
Scoop out about 3/4 cup of this mixture and set it aside for the topping. Take the rest and press it firmly into your prepared pan. Use your fingers or the bottom of a measuring cup to really pack it in—this helps it stay together as a sturdy crust. Slide the pan into the oven and bake for about 10 minutes. It won’t look done-done, just a bit puffed and lightly set, and that’s exactly what we want.
While the crust is baking, whisk together the filling: sweetened condensed milk, sour cream (or yogurt), egg yolk, lemon juice, lemon zest, and a splash of vanilla if you like. The mixture should be silky and thick; if the lemon juice seems to “thicken” it a bit more, that’s normal and good—it means your filling will set nicely. Smell that lemon. It already feels like spring, right?
Pull the crust out after its 10 minutes. Pour the lemon filling over the hot crust and tilt the pan gently so it spreads to the edges. Sprinkle the reserved crumb mixture evenly over the top; a few bigger clusters are actually lovely and add texture. Pop it back into the oven and bake for another 17 to 20 minutes, until the top is lightly golden and the edges look set. If the middle still has a tiny jiggle, don’t worry, it will firm up as it cools.
Now the hardest part: let it cool completely before slicing. I know, I know. If you can, chill the pan in the fridge for at least an hour—this makes clean, pretty squares and keeps the filling from squishing out. Run a knife along the edges, lift with the parchment, and then cut into bars. You did it. You absolutely did it.
Smart Tips for the Very Best Bars
Press that crust down firmly; really lean into it. A well-packed base keeps the bars from crumbling to bits when you slice, especially if you’ll be packing them in lunchboxes. If your lemons are a little sad or not very juicy, roll them on the counter and microwave for 10–15 seconds before squeezing—you’ll get more juice and flavor. For even more lemon pop, you can bump the zest up a bit; zest is where so much of the flavor hides.
These are PERFECT for make-ahead: bake the day before, cool, cover, and refrigerate. They keep well for 4–5 days in the fridge, and you can also freeze slices individually in airtight containers for up to 2 months. Let frozen bars thaw in the fridge or on the counter, or give them a quick 10–15 seconds in the microwave if you like them a touch warm. For kids, I often cut them into smaller “snack squares” or even little fingers—less mess, more fun, everyone happy. Remember, there’s no test at the end; this is just dessert. You’re doing great.
How to Serve and Enjoy Your Lemon Crumb Bars
These bars shine at just about any gathering: baby showers, book club, Sunday dinners, school potlucks, or honestly that random Tuesday when you just need something bright. I love serving them chilled with a few fresh berries on the side and a little dusting of powdered sugar when I’m feeling fancy. For a more indulgent moment, add a small scoop of vanilla or lemon frozen yogurt on top and let it melt into the crumbs—SO good.
If you’re hosting brunch, set them out on a pretty board with coffee, tea, and maybe some fruit salad. For summer cookouts, they’re amazing straight from the fridge when it’s hot outside. Leftovers can be crumbled over Greek yogurt for a dessert-for-breakfast situation (no judgment, I promise) or used as a topping on a simple bowl of fruit. However you serve them, they have this way of making people smile and go, “Wait, you MADE these?”
Lemon Crumb Bars Questions, Answered
Yes, absolutely. Use a good 1:1 gluten-free baking flour in place of the all-purpose flour, and be sure your oats are certified gluten-free. The texture will be slightly more tender, but still really lovely and crumbly in the best way.
Fresh is best here because the flavor is brighter and cleaner, and you need the zest anyway. In a pinch, you can use bottled, but try to at least add fresh zest if you can. It really makes them taste like REAL lemon, not “lemon-flavored.”
Yes, you can double everything and bake in a 9×13-inch pan. The bake time may increase by a few minutes, so start checking the second bake around 20 minutes and look for that lightly golden top and mostly set center.
I like to store them in an airtight container in the fridge; they stay fresher and slice more cleanly. You can leave them at room temperature for a day if needed for serving, but for longer than that, the fridge is your friend.
You can. These are already pretty balanced by the lemon, but you can use plain yogurt instead of sour cream, and you can swap a couple tablespoons of the brown sugar for a low-calorie sweetener you like. Just know the texture might change a tiny bit, but honestly, they’ll still be very delicious.
I hope these Homemade Lemon Crumb Bars bring as much joy into your kitchen as they bring into mine—because they’re simple, they’re bright, and they just feel like a win every single time. If you try them, tell me how it went, what you changed, what your people thought. Snap a photo and tag me if you share on social media so I can cheer you on from my little corner of Austin. You can absolutely make this recipe your own… and now I’m wondering, which version will you bake first?
Lemon Crumb Bars
These homemade lemon crumb bars are sweet, tangy, and buttery, making them a perfect quick dessert that everyone will love.
Ingredients
For the crust and topping
- 1 cup all-purpose flour Can substitute half with white whole wheat flour for nuttiness.
- 1 cup old-fashioned oats Ensure they are certified gluten-free for gluten-free version.
- 1/4 teaspoon salt Omit if using salted butter.
- 3/4 teaspoon baking soda
- 10 tablespoons unsalted butter, melted Substitute with salted butter and omit added salt.
- 1/2 cup light brown sugar, packed
- 1 teaspoon pure vanilla extract
- 3/4 cup reserved crumb mixture Set aside from the crust mixture.
For the lemon filling
- 1 can (14 oz) sweetened condensed milk
- 2 tablespoons sour cream (or plain yogurt) Greek yogurt can be used for added protein.
- 1 large egg yolk
- 1/4 cup freshly squeezed lemon juice
- 1 tablespoon finely grated lemon zest
Instructions
Preparation
- Preheat your oven to 350°F (175°C). Line an 8x8-inch baking pan with parchment paper and spray with nonstick spray.
- In a bowl, whisk together the flour, oats, salt, and baking soda.
- In another bowl, stir together the melted butter, brown sugar, and vanilla extract until glossy.
- Pour the wet mixture into the dry mixture and mix until evenly moistened and clumpy.
- Scoop out about 3/4 cup of the mixture and set aside for the topping. Press the remaining mixture firmly into the prepared pan.
- Bake the crust for about 10 minutes until lightly set.
Making the Filling
- In a bowl, whisk together the sweetened condensed milk, sour cream, egg yolk, lemon juice, and lemon zest until silky and thick.
- Pour the lemon filling over the hot crust and sprinkle the reserved crumb mixture evenly on top.
- Bake for another 17 to 20 minutes until lightly golden and edges are set.
Cooling and Serving
- Allow the bars to cool completely before slicing. For clean slices, chill in the fridge for at least an hour before cutting.
Notes
These bars can be made ahead and kept in the fridge for 4-5 days, and they freeze well for up to 2 months. Serve them chilled, with fresh berries and a dusting of powdered sugar for a fancy touch.