Follow Me On Social Media!
Better Than Anything Bars

GOOD TO KNOW:
The jump to recipe button is there for convenience, but taking a moment to read the full post can make a real difference. You will find useful ingredient notes, extra step-by-step guidance, common troubleshooting answers, and other practical details that can help the recipe come out just right.
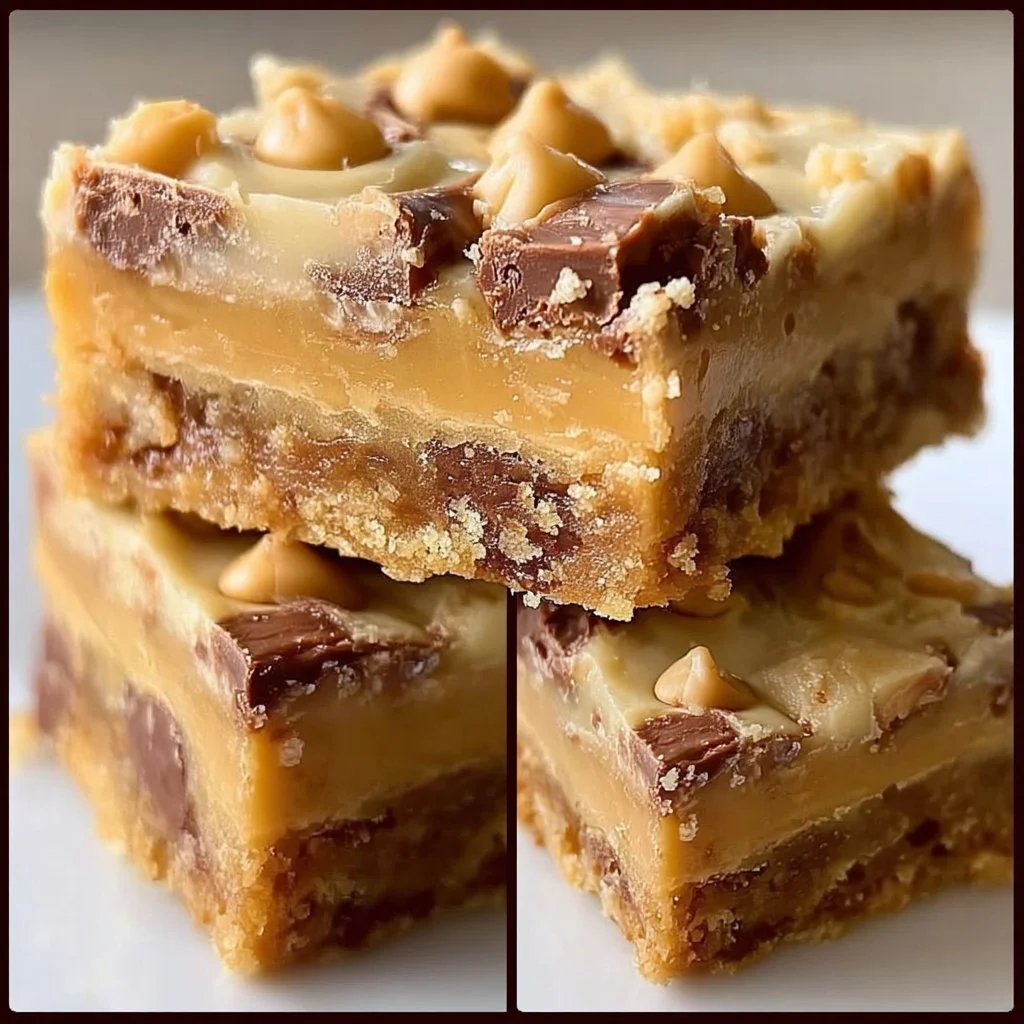
If you’re hunting for a crowd-pleasing dessert bar recipe, these Better Than Anything Bars are about to be your new obsession. These Better Than Anything Bars are gooey, chewy, chocolatey, and wildly simple—like, dangerously simple. Sweet caramel, soft cookie layers, melty chocolate chips… all stacked into one pan of absolute happiness. They’re perfect for potlucks, bake sales, busy weeknights, or those “I just need something amazing right now” moments.
I actually stumbled into this recipe on a chaotic Thursday when I had zero time and a serious sweet tooth. I threw together what I had—basic pantry ingredients—and the first bite was one of those eyes-widening, “wait, what did I just make?” moments. I took a pan to my husband’s office and they disappeared in minutes. I brought them to a teacher friend’s lounge, GONE. Over and over, people said, “These are better than anything.” So the name stuck, and honestly, it’s not wrong, not even a little bit.
They mix up in one bowl plus a whisk, use everyday ingredients, and you don’t need any special skills. You can prep them ahead, freeze them, tweak them to your taste. Make it easy. Make it delicious. Make it yours. That’s exactly what these Better Than Anything Bars do.
Why These Bars Are Going To Steal Your Heart
You know that recipe you keep coming back to because it ALWAYS works? That’s what these Better Than Anything Bars become. They’re soft in the middle, just a little crisp on the edges, and full of gooey caramel and warm chocolate, and honestly that texture combo is ridiculous in the best way. They feel over-the-top indulgent but use ingredients you probably already have sitting in your pantry, which means no emergency grocery store run when you’re already in your pajamas.
They’re fantastic for family cooks because the batter is forgiving, your kids can help (and they will want to), and they travel beautifully for school events or church gatherings. If you’re a meal prepper, you will LOVE that these bars freeze like a dream—slice, freeze, and you’ve basically got instant dessert on standby. Pinterest friends who like to collect “keeper” recipes? This is a 100% pin-it-and-make-it recipe, not just one that looks pretty.
And they’re flexible. Want more chocolate? Sprinkle a little extra. Want them slightly less sweet? Use a darker chocolate chip. Need something that feels cozy but won’t keep you in the kitchen all day? These are in the oven in about 15 minutes, tops. I keep saying they’re so good because, well, they’re SO good, and I want you to feel that energy when you pull your pan out of the oven. You can absolutely do this, and it’s going to turn out amazing, truly.
What You’ll Need For Better Than Anything Bars
- 2 1/2 cups all-purpose flour
- 1 teaspoon baking soda
- 1/2 teaspoon salt
- 1 cup unsalted butter, softened
- 1 cup brown sugar, packed
- 1/2 cup granulated sugar
- 2 large eggs
- 2 teaspoons vanilla extract
- 2 cups semi-sweet chocolate chips
- 1 cup caramel sauce
- Optional: 1/2 teaspoon sea salt for topping
The ingredient list looks classic on purpose—this is really a dressed-up chocolate chip cookie bar meets caramel magic. The brown sugar keeps everything soft and flavorful, and the vanilla gives it that bakery-style smell that has everybody wandering into the kitchen asking, “What are you making?”
Use any all-purpose flour you like; I grab mine from a big bag at Costco because, hi, baking a lot over here in Austin. Semi-sweet chocolate chips keep the bars from being overly sweet, but if you love dark chocolate, swap some in, no problem. Even dairy-free chips work if you’re trying to be more mindful; the bars are very forgiving.
For the caramel sauce, you can use a store-bought thick caramel topping (the kind you’d drizzle on ice cream) or a homemade one if you’ve got it on hand. If you’re watching your sugar just a bit, you can use a lighter caramel or reduce the drizzle slightly, but honestly, these are meant to be a treat. A once-in-a-while, very worth-it kind of treat. The optional sea salt on top? Highly recommend—it balances the sweetness and makes them feel extra fancy with almost zero effort.
Cost tip from my teacher-brain: buy butter and chocolate chips on sale and freeze them. Then when the craving hits, you’re basically halfway to dessert already. And if you want to experiment—go for it. Toss in a handful of chopped nuts, swirl in a little peanut butter with the caramel, or try a mix of milk and dark chips. Make it yours.
How To Make Them (It’s Easier Than You Think)
Start by preheating your oven to 350°F (175°C) and lining a 9×13-inch baking dish with parchment paper. Leave a little overhang so you can lift the bars out later—this tiny step makes slicing SO much easier, and you’ll thank yourself later. If you forget? It’s okay. Just grease the pan well and cut them right in the dish.
In a medium bowl, whisk together the flour, baking soda, and salt; set that aside. We’re just getting the dry ingredients ready so they blend in smoothly and don’t create weird flour pockets. Two minutes of prep, totally worth it.
Now grab a large bowl (or your stand mixer if that’s your happy place). Cream the softened butter with the brown sugar and granulated sugar until light and fluffy. This usually takes about 2–3 minutes with an electric mixer. Don’t worry if you’re doing it by hand—just beat until it looks creamy and lighter in color. This step is where the magic texture starts, so give it a tiny bit of love.
Add the eggs one at a time, mixing well after each addition, then stir in the vanilla extract. The batter will look silky and thick. If it looks slightly separated for a second, keep mixing, it comes together. You’re doing great.
Gradually add the dry ingredients into the wet mixture until fully incorporated. I like to add them in 2–3 portions so flour doesn’t fly everywhere (learned that the messy way). Stop as soon as the streaks of flour disappear; overmixing is not our friend here.
Fold in the chocolate chips gently. When they’re evenly distributed, press about half the dough into the bottom of your prepared baking dish. It will look like it’s not enough, but trust the process—just press it out to the corners with your fingers or the back of a spatula.
Now drizzle the caramel sauce over that bottom layer. Try to go almost to the edges, but leave a tiny border if you can so it doesn’t glue itself to the pan sides. Then drop spoonfuls of the remaining dough all over the caramel and gently spread it. It won’t be perfect and that’s okay—the little gaps let caramel peek through and bubble up.
Bake for 25–30 minutes, or until the top is golden brown and just set in the center. If it still looks very jiggly, give it a few more minutes, but don’t overbake; they’ll firm up as they cool. Your kitchen will smell unreal right about now.
This is the hardest part: allow the bars to cool completely before cutting. If you slice too soon, they’ll be super messy (still delicious, just messy). Once cool, sprinkle with sea salt if you’re using it, lift them out with the parchment, and cut into squares.
Smart Tips To Make Them Even Better
For cleaner slices, chill the baked bars in the fridge for about 30–45 minutes, then cut with a sharp knife. You can let them come back to room temp for serving, or not—cold, chewy bars are pretty fantastic too. To make them ahead, bake the day before, cool, cover tightly, and leave at room temperature; they stay soft for about 3 days.
If you want to freeze them, cut into bars, wrap individually, and stash in an airtight container. They thaw quickly on the counter and make the BEST emergency dessert or lunchbox surprise. To refresh a bar, warm it in the microwave for 10–15 seconds until just slightly melty in the center—instant “fresh from the oven” vibes.
You can totally double this recipe for a crowd and bake it in two 9×13 pans. Just don’t cram into one giant pan or the middle may stay underbaked. For kids, I sometimes leave off the sea salt and cut them into smaller squares so they’re treat-sized but not huge.
Teacher voice moment: read through the steps once before you start, measure ingredients before you mix, and clean up while they bake. Future you will be SO happy.
How To Serve And Enjoy
These Better Than Anything Bars are wonderful just as they are, but if you want to really go for it, serve them slightly warm with a scoop of vanilla or salted caramel ice cream. A drizzle of extra caramel on top? Absolutely yes. For a more casual thing, I’ll pile them on a big plate and set them in the middle of the table—family-style always feels cozy and inviting.
They’re perfect for birthday parties, game nights, holiday dessert tables, or that random Tuesday when you just need a win. I like to serve them with coffee for adults and cold milk for kids. If you’ve got leftovers (lucky!), crumble a bar over yogurt or ice cream, or chop into tiny chunks and stir into homemade trail mix for a fun little sweet surprise.
Honestly, these bars turn any regular day into a mini celebration. Why not bake a pan and see what happens at your house?
Questions People Always Ask About These Bars
Yes, absolutely. A hand whisk and a sturdy spatula or wooden spoon is enough. Just cream the butter and sugars really well with elbow grease until they’re lighter and fluffy, then continue as directed. It might take an extra minute or two, but totally doable.
A 9×13 pan is ideal for the balance of thickness and baking time, but you can use a slightly smaller pan for thicker bars—just add a few extra minutes of bake time and keep an eye on the center. I don’t recommend a much larger pan or they’ll bake too thin and dry out.
A thicker, spoonable caramel or caramel topping works best so it holds a nice layer between the dough. Very thin, runny caramel can seep too much into the bars. Store-bought is fine; homemade is fantastic if you have it. Use whatever you’ll actually use.
You can swap in part dark chocolate chips, reduce the caramel slightly, or cut smaller squares so the portions are naturally lighter. They’re still a treat, of course, but a very worth-it kind of treat in my opinion.
They’re best within 2–3 days at room temperature, stored in an airtight container. After that, pop them in the fridge or freezer if you want to keep them longer.
These Better Than Anything Bars are the kind of recipe that makes you feel like a baking rockstar without stressing you out. Easy ingredients, simple steps, HUGE payoff. If you try them, I would absolutely love to hear how they turned out—drop a comment, send me a message, or tag your pan on social media so I can cheer you on.
You can do this, you really can, and once you taste that first warm, gooey bite… well, you’ll see exactly why I keep making them again and again and again.
Better Than Anything Bars
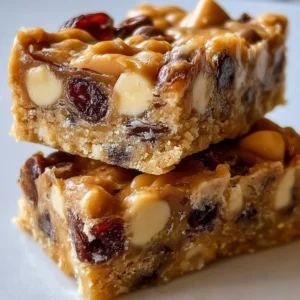
Gooey, chewy, and chocolatey dessert bars made with simple pantry ingredients—perfect for any occasion!
Ingredients
Dry Ingredients
- 2 1/2 cups all-purpose flour
- 1 teaspoon baking soda
- 1/2 teaspoon salt
Wet Ingredients
- 1 cup unsalted butter, softened
- 1 cup brown sugar, packed
- 1/2 cup granulated sugar
- 2 large eggs
- 2 teaspoons vanilla extract
- 1 cup caramel sauce Store-bought or homemade
Mix-ins
- 2 cups semi-sweet chocolate chips Or mix of dark and semi-sweet
- 1/2 teaspoon sea salt (optional) For topping
Instructions
Preparation
- Preheat your oven to 350°F (175°C) and line a 9×13-inch baking dish with parchment paper, allowing overhang for easy removal.
- In a medium bowl, whisk together the flour, baking soda, and salt; set aside.
Mixing Wet Ingredients
- In a large bowl, cream the softened butter with the brown and granulated sugars until light and fluffy, about 2-3 minutes.
- Add the eggs one at a time, mixing well after each addition. Stir in the vanilla extract.
Combining Ingredients
- Gradually add the dry ingredients into the wet mixture until fully incorporated, being careful not to overmix.
- Fold in the chocolate chips gently.
- Press about half of the dough into the prepared baking dish, drizzle caramel sauce over it, and then drop spoonfuls of the remaining dough on top.
Baking
- Bake for 25-30 minutes, or until the top is golden brown and set in the center. Allow to cool completely before cutting.
- If using sea salt, sprinkle on top after cooling.
Serving Suggestion
- Serve slightly warm with a scoop of ice cream or at room temperature. Enjoy!
Notes
These bars freeze well. Wrap individual bars and store in an airtight container. To refresh, warm in the microwave for 10-15 seconds.